top of page

Blog

Welcome to the Soredenacho Photography Blog, where I, Nacho, share my experiences as a professional photographer based in Tokyo, Japan.


My passion lies in capturing authentic moments, whether through corporate event photography, portraits, landscapes, architecture, or street photography. This blog is where I document my journey, share insights from my photo sessions, and provide valuable tips on photography techniques.

What to Expect on This Blog

This blog will be a space where I share my experiences from photo sessions, discuss challenges I’ve faced, and provide behind-the-scenes insights. I’ll also share tips on camera settings, lighting techniques, composition, and post-processing.

Whether you're a fellow photographer, a client looking for professional photography services, or someone who simply appreciates visual storytelling, I hope you find inspiration here. Stay tuned for new posts about my latest projects, favorite locations in Japan, and the stories behind my shots! 🚀📷

Screenshot 2025-01-01 at 0.24.40.png

Where can I have a night engagement photography session in Tokyo?

Planning a Tokyo by night engagement shoot requires careful location selection you want iconic lights, romantic ambiance, and fewer crowds. As a Sony shooter, I look for spots where the ambient lighting complements low-light sensor performance and allows for wide-aperture portrait work. In Tokyo, permit rules, crowd flow, and timing are all critical.


Knowing where you can legally shoot and when the lighting is optimal can make or break a night session. Here I highlight some of my favorite Tokyo night spots for engagement photography sessions in Tokyo, particularly when using Sony mirrorless cameras.

  1. Shiba Park / Zojo-ji Temple: Right next to Tokyo Tower, Zojo-ji provides a majestic temple foreground with the illuminated tower behind ideal for silhouette or wide portrait shots. Nighttime temple lighting plus Tokyo Tower glow gives a romantic contrast, and the grounds are accessible after sunset.


  2. Sumida Park along the Sumida River: You’ll get reflections of Tokyo Skytree or river lights, and carefully framed engagement portraits along the water make for dreamy compositions.


  3. Tokyo Station Marunouchi Front: The retro red-brick façade of Tokyo Station, softly lit at night, offers a refined and elegant backdrop. The station plaza gets fewer crowds later in the evening, letting you shoot portraits with architectural lines and ambient glow.


  4. Asakusa lantern alleys near Senso-ji and Kaminarimon: Evening lanterns and traditional street lamps create warm, inviting lighting. For couples in kimono, this area adds traditional charm and soft light for romantic kimono photo session in Tokyo engagement portraits.


  5. Shinjuku Memory Lane (Omoide Yokocho): Narrow alleys with small lanterns and low-hanging lights deliver cozy, atmospheric scenes. Shooting here at night can result in intimate, cinematic engagement images, though photographer discretion and local awareness (and permits) are essential.


For night engagement photography sessions in Tokyo, each location has its own lighting rhythm and pacing choosing the right time (blue hour, after sunset, or late evening) can turn a simple portrait into a magical memory. Scout your spot ahead of time, secure required permits, and plan your Sony camera settings for low-light work to make the most of Tokyo by night.


Which Tokyo night illumination spots are best for couple photography with Sony?

Tokyo transforms after dark into a luminous playground of neon signs, lanterns, and architectural lighting and for a photographer shooting with Sony gear, this world of light becomes an opportunity to capture fine details, moody atmospheres, and rich color palettes. In this section I’ll walk through my experience scouting night illumination spots for couple shoots, highlighting what to look out for, how the light behaves, and why certain areas work better with Sony’s low-light autofocus and high ISO performance.


One of the first spots I often recommend is Asakusa and Senso-ji Temple. Though busy by day, the temple grounds and Kaminarimon lantern entrance take on a quieter charm in the evening. The warm glow of paper lanterns, the red gates, and traditional architecture offer a timeless backdrop especially for couples dressed in kimono. With Sony’s eye autofocus and good high ISO handling, it’s much easier to keep faces sharp even at slow shutter speeds. However, it’s critical to arrive just after sunset, wait for foot traffic to drop, and move into smaller side alleys away from crowds. I’ve done kimono photo sessions in Asakusa that leaned heavily on handheld shooting at ISO 3200–6400, letting me render ambient light and romantic expressions without heavy flash.


Another favorite is Zojo-ji Temple looking toward Tokyo Tower. The temple’s dark temple rooflines juxtaposed with the bright Tokyo Tower lights make for dramatic romantic portraits. Late evening, when the temple courtyard is relatively empty, is the best time. On a clear night, Tokyo Tower’s orange glow fills the sky beautifully, and with Sony cameras I can dial in a shallow depth of field (e.g. f/1.8 or f/2) to softly blur the temple in the foreground while keeping the couple crisp in the frame. Tripods are useful here, but often a monopod or stabilized lens is sufficient, especially if mobility is required.


If neon urban backdrops are more your style, Shinjuku’s neon districts especially the area around Kabukichō and Shinjuku Golden Gai provide a very different feel. Alleyways flooded with colorful signs, reflections in shop windows, and tiny bars lit with red and yellow lights give dramatic, cinematic couple portraits. That said, shooting in these crowded neon districts demands patience, good timing, and awareness of permit restrictions. For example, Golden Gai has narrow private alleys and photographic restrictions, so always check local regulations ahead of time. Sony’s silent shutter mode can help minimize distraction and allow the couple to move more naturally without shutter noise disrupting the vibe.


Finally, Odaiba waterfront or Rainbow Bridge viewpoints are excellent when a skyline is desired. The water, bridge lights, and skyline reflections create a dreamy, romantic vista. In these setups, combining a Tokyo skyline kimono session or evening couple shoot involves balancing exposure between the bright city lights and the subject. Sony cameras with good dynamic range help a lot here shooting in RAW and underexposing slightly (–0.3 to –1 stop) can preserve highlight detail in the background, allowing you to bring back details in post. If the couple wears light or reflective outfits, pull back shadows carefully so that the face retains warmth and detail without blowing out the city lights.


In summary, Tokyo’s night illumination spots span from historic temples and lantern-lit alleys to neon canyons and waterfront skylines. Each has its unique lighting challenges and narrative potential, especially for night couple photography sessions in Tokyo. As a photographer working with Sony gear, understanding how to read ambient light, anticipate crowd flow, and position your subjects against or within those lights is key to capturing emotional and polished romantic images.


How to shoot a kimono photo session in Asakusa under Tokyo lantern lights?

Asakusa is one of Tokyo’s most iconic traditional neighborhoods, and shooting a kimono photo session in Tokyo under lantern lights there blends Japanese cultural aesthetics with rich evening ambiance. From the glowing red lanterns of Kaminarimon gate to the softly lit side streets, the ambient light can enhance kimono textures, bring out vivid colors, and frame romantic expressions in twilight. But working under lantern light at night also poses specific challenges white balance shifts, limited light, and unexpected crowds. So preparation is key.

  • Use a Sony camera with good low-light autofocus (for example, Sony A7S II/III or A7C models) and shoot wide open (f/1.8–2.8) to let in as much light as possible while isolating the subject.


  • Set custom white balance or shoot in RAW so you can correct warm lantern tones in post this helps accurately render kimono colors and skin tones.


  • Scout quiet side streets and plan to shoot just after sunset or after 9 p.m., when the foot traffic near Senso-ji and Kaminarimon has died down, to minimize background distractions and allow for slower shutter speeds.


Once light levels drop, you’ll see lanterns cast soft pools of light that highlight the folds and patterns of a kimono beautifully, especially when backlighting or side-lighting the subject. As the photographer, walking alongside or circling your couple can help you catch subtle lantern glows on fabric edges or hair, creating a halo effect that feels intimate and cinematic.


While a tripod can be helpful, it often limits framing flexibility in narrow alleys instead, lean on Sony’s in-body stabilization or a stabilized lens to maintain mobility. In the end, a well-executed Asakusa kimono shoot under lantern light can create evocative kimono family photo session in Japan or couple portraits that feel timeless, blending traditional Japanese heritage with the serenity of evening. Don’t rush the shoot, let the light settle, listen to your senses, and let your subjects relax into the storytelling that Asakusa at night naturally offers.


What are the best Tokyo streets for a romantic evening photography session?

Tokyo at night reveals a tapestry of streets illuminated by neon, lanterns, storefronts, and architectural lighting the kind of light that can make romantic evening photography sessions truly magical. When planning a photography session in Tokyo, especially for couples or engagement shoots, picking the right street with emotional resonance, balanced lighting, and manageable pedestrian flow is essential. Here are my top picks for romantic Tokyo streets that work beautifully after dark, particularly for Sony shooters who thrive in low-light environments.

  1. Asakusa Nakamise Street toward Senso-ji: The lanterns lining the shopping street offer warm, repetitive lighting patterns, creating a tunnel of light effect that frames couples nicely. Moving away from the main gates toward side alleys softens the harsh lighting and reduces crowd interference.


  2. Shibuya Center-Gai and Shibuya Scramble Crossing: While crowded, the massive LED billboards and neon lighting create cinematic backdrop possibilities backlit silhouettes of couples crossing or standing in the crowd can yield dynamic romantic photos, though timing and positioning are everything.


  3. Omoide Yokocho / Shinjuku Memory Lane: Tight alleys lined with small restaurants and hanging lights offer cozy and intimate lighting scenarios, ideal for emotional close-ups or candid couple moments. The street lanterns feel soft and nostalgic.


  4. Kabukichō side streets: Neon signs and colorful reflections in wet pavement can give a gritty, romantic noir aesthetic. These streets are better for moody portrait work rather than classic romance, and require patience and proper permission for photography.


  5. Marunouchi Gyoko-dori Underground Gallery or Marunouchi pedestrian streets: These can be quieter after business hours and sometimes feature subtle architectural lighting or seasonal decorations. They offer clean, structured backgrounds for romantic portraits without overwhelming neon brightness.


When selecting a Tokyo street for an evening photo session, consider light direction, pedestrian timing, and the emotional tone you want to convey. Whether it's warm lantern light, neon reflections, or crowd energy, each street delivers a distinct mood for your romantic evening photography session in Tokyo.


As a Sony shoot­er, making sure you shoot in RAW, set correct white balance, and adjust exposure for highlights will help preserve mood and color. Scout the street at the time of day you intend to shoot, bring minimal gear to stay mobile, and let your couple move naturally within the space that’s often what makes the best romantic shots come to life.


How to plan a Tokyo kimono family photo session at night in Japan?

Family photo sessions in Tokyo are always special, but when you introduce kimono family photo session in Japan into the mix and do it at night you elevate the shoot into a beautiful interplay of tradition, light, and emotion. Planning such a session means more than just choosing outfits: you must coordinate lighting, timing, crowd flow, and comfort for all family members, especially when the children wear kimono.


As a photographer shooting with Sony cameras, I look ahead at how ambient lantern or street lighting will render kimono fabrics, how parents and children will move in and out of light, and how to keep everyone comfortable during a night shoot.

  • Schedule the session near lantern-lit temple grounds (like Asakusa or Senso-ji) or along riverside walks (Sumida River) where the ambient lighting is warm and diffused. Select a time window just after twilight when lanterns or street lamps begin to glow, but crowds begin to thin.


  • Choose kimono rental shops (such as Kimono Rental Wargo Asakusa or Hanayaka Tokyo) that offer dressing and hairstyling services, and ideally ones that are near your shoot locations to minimize walking and changes.


  • Bring a small diffuser or reflector to gently soften harsh lantern light, especially when photographing kids or older family members, and consider short breaks so everyone stays comfortable and fresh during the session.


Night kimono family shoots can produce stunning, atmospheric photographs that celebrate heritage, evening glow, and intergenerational connection. As the photographer, I make sure to plan gentle pacing, allow time for outfit adjustments, and use Sony’s high ISO capabilities cautiously so that textures of kimono and facial expressions stay crisp without introducing unwanted noise.


A relaxed family, soft lighting, and thoughtful pacing will make the evening kimono session comfortable and memorable for everyone. It’s not just about capturing the night, it’s about capturing the feeling of togetherness in a beautifully lit Tokyo moment.


Where to find Tokyo towers and bridges for nighttime engagement portraits?

Tokyo’s skyline is defined not only by its skyscrapers but also by its towers and bridges, which glow dramatically after sunset. For couples planning engagement photography sessions in Tokyo, these landmarks provide breathtaking architectural backdrops with vibrant lighting and reflections.


As a Sony photographer, I look for vantage points where tower lights or bridge illuminations enhance the couple’s presence in the frame without overwhelming them. Timing, composition, and safety are all important considerations when shooting at night around these iconic structures.

  1. Tokyo Tower: One of the most romantic symbols of Tokyo, illuminated in warm orange tones at night. Shooting from nearby Shiba Park or Zojo-ji Temple offers both intimacy and scale. Couples in kimono can stand in contrast with the tower’s glow, making this perfect for night engagement photography in Tokyo.


  2. Tokyo Skytree: The tallest structure in Japan offers customizable lighting patterns throughout the year. Shooting from Sumida Park or along the river provides great reflections, while the tower’s vibrant lighting serves as a dramatic backdrop for wide-angle portraits.


  3. Rainbow Bridge: This suspension bridge connects Odaiba to central Tokyo and lights up in rainbow hues during special events. Waterfront engagement portraits with the bridge in the background capture both modern romance and Tokyo’s skyline beauty.


  4. Eitai Bridge: Overlooking the Sumida River, Eitai Bridge is known for its blue LED arches. The reflections on the water make evening engagement portraits atmospheric, especially when shot at long exposure with Sony’s stabilized lenses.


  5. Kachidoki Bridge: A rare drawbridge in Tokyo, Kachidoki lights up elegantly at night. Framing couples with the illuminated steel arches creates dynamic engagement shots with industrial character.


Each tower and bridge offers its own unique vibe from Tokyo Tower’s nostalgic glow to Rainbow Bridge’s vibrant modernity. To make the most of these sites, plan your visit when lights are fully illuminated, bring a tripod if necessary, and keep safety in mind around busy riverside paths. For couples, these iconic locations ensure their Tokyo nighttime engagement portraits will be both memorable and deeply tied to the city’s identity.


How to combine a kimono photo session and Tokyo skyline for evening family photos?

Combining the elegance of a kimono family photo session in Japan with the sweeping beauty of the Tokyo skyline creates images that are both cultural and contemporary. The vibrant lights of Tokyo skyscrapers frame the silhouettes of families dressed in traditional attire, offering a perfect balance between heritage and modern life.


As a Sony photographer, I often encourage families to consider these hybrid sessions because they deliver not just portraits but timeless storytelling moments where fashion and cityscape collide.


One of the most effective approaches is to start at a kimono rental shop near the desired skyline location. In areas like Asakusa, Shinjuku, or Odaiba, rental studios make it convenient for families to dress, style, and walk to nearby vantage points.


Once in kimono, the visual contrast against glass towers or illuminated bridges becomes powerful the soft texture of the fabric paired with modern lights. For example, at Odaiba, the Rainbow Bridge provides vibrant skyline views that frame families naturally in front of water reflections.


Timing is critical. Golden hour leading into twilight ensures that kimono colors pop against the fading blue sky, and by the time the skyline is fully lit, families can move to positions where the lights act as glowing backdrops. Children often tire quickly, so a slower pace with planned breaks is essential. Sony’s fast autofocus helps keep candid family interactions sharp even in low-light conditions, allowing the session to feel relaxed instead of posed.


For families seeking cultural richness, pairing kimono with iconic Tokyo towers adds depth to the story. Imagine parents in kimono holding their children’s hands with Tokyo Tower’s orange glow behind them, or a family walking along Sumida River with Tokyo Skytree lit up in pastel tones. These sessions not only produce extraordinary images but also honor the intersection of tradition and Tokyo’s cosmopolitan night energy.


Ultimately, combining kimono with skyline photography offers families a visual narrative that bridges history and modernity. It’s an opportunity to celebrate Japanese culture while showcasing the breathtaking skyline of Tokyo, resulting in family photo sessions in Japan that are deeply memorable.


Which Tokyo neighborhoods offer the best neon light backdrops for night couple shoots?

Tokyo is famous for its neon-lit districts that transform the city into a cinematic wonderland after dark. For couples looking to capture edgy, vibrant, and urban portraits, selecting the right neighborhood is key. Each district has a different personality, from the bustling energy of Shibuya to the eclectic charm of Harajuku. As a Sony photographer, I rely on the city’s neon lighting to create dramatic backdrops for couple photography sessions in Tokyo that feel both authentic and stylish.

  1. Shibuya: Home to the world-famous Scramble Crossing, Shibuya is iconic for its massive LED screens and neon glow. Couples can pose in the middle of the crossing or on elevated viewpoints for cinematic shots.


  2. Shinjuku: Known for Kabukichō and Omoide Yokocho, Shinjuku offers endless neon signs and colorful reflections. It’s the heart of nightlife and creates moody yet romantic atmospheres.


  3. Harajuku: Takeshita Street and its surrounding alleys offer playful, colorful lights. This neighborhood is perfect for couples who want a more youthful, quirky aesthetic in their night couple shoots in Tokyo.


  4. Ikebukuro: With Sunshine 60 Street and vibrant shopping arcades, Ikebukuro is slightly less crowded but still full of neon charm. Its energy works beautifully for dynamic couple portraits.


  5. Akihabara: Famous for its electronics stores and anime culture, Akihabara glows with colorful LED signs that make for bold and unique backdrops. Couples who want an unconventional, urban-pop look will love this setting.


From Shibuya’s massive screens to Harajuku’s playful alleys, each Tokyo neighborhood offers a distinct neon vibe. Couples should choose a district that matches their personality, whether it’s cinematic, romantic, or quirky. With Sony’s low-light capabilities, capturing the glow of neon signs while keeping skin tones natural becomes seamless. A Tokyo neon couple shoot is more than just a portrait session it’s a journey into the vibrant energy of the city’s nightlife.


How to capture Tokyo Shibuya Crossing or Shinjuku streets in night engagement photography?

Few places in the world capture the energy of a city like Shibuya Crossing or the neon streets of Shinjuku. For couples, these spots represent the pulse of modern Tokyo and make unforgettable backdrops for night engagement photography sessions. Yet they are also crowded, dynamic, and constantly changing, which means photographers must adapt quickly.


Shooting in these districts is both a challenge and a reward the chaos of the city can either overwhelm or elevate your photos, depending on how you approach it:

  • At Shibuya Crossing, use elevated viewpoints (such as from Shibuya Sky or nearby cafés) for wide angles, or shoot street-level for cinematic, in-the-moment portraits.


  • In Shinjuku, focus on Kabukichō and Omoide Yokocho for neon backdrops, but shoot during late evening when crowds thin slightly.


  • Use Sony’s continuous autofocus and fast lenses to freeze motion while keeping your couple sharp against the busy background.


The key to success in Shibuya and Shinjuku is blending your couple naturally into the flow of the city. Instead of fighting the crowd, let it become part of the narrative, creating dynamic images that capture love in the heart of Tokyo’s nightlife. Shibuya’s cinematic energy contrasts with Shinjuku’s colorful neon chaos, offering two very different moods. Whether you’re shooting close-up candid moments or dramatic wide-angle portraits, these districts provide the ultimate stage for unforgettable night engagement photography in Tokyo.


What Sony camera settings are optimal for Tokyo night photography sessions?

When photographing night photography sessions in Tokyo, mastering your camera settings is as important as choosing the right location. Sony mirrorless cameras excel in low light, but they still require careful balancing of aperture, ISO, and shutter speed to achieve professional results. As a photographer, I’ve tested various combinations across neon districts, temples, and skyline backdrops, and I’ve found settings that consistently deliver sharp, vibrant images in challenging conditions.


Start with aperture. Wide apertures such as f/1.4 or f/1.8 are ideal for portraits because they isolate the subject against neon or lantern backgrounds while letting in as much light as possible. However, if you’re shooting groups or want skyline details sharper, stopping down to f/2.8 or f/4 offers more depth without sacrificing too much light. Pairing these apertures with Sony’s eye autofocus ensures accurate subject tracking even in dim environments.


Next is ISO management. Sony’s full-frame sensors handle ISO 3200–6400 very well with minimal noise, especially when shooting RAW. For engagement sessions in neon areas like Shinjuku, I often push ISO up to 8000 if necessary, confident that post-processing will retain detail and skin tones. However, for temple or lantern shoots, I try to stay at ISO 3200 to preserve softer, warmer tones. The key is exposing for highlights underexpose slightly to prevent blown neon signs and recover shadows later.


Shutter speed is where creativity comes in. For handheld portraits, 1/100s or faster prevents motion blur while taking advantage of Sony’s image stabilization. If you want to incorporate movement for example, cars passing in Shibuya Crossing slower shutter speeds (1/20s to 1/5s) combined with a tripod create cinematic motion trails while keeping the couple sharp. It’s a technique that works beautifully for engagement photography in Tokyo at night.


Finally, always shoot in RAW and use custom white balance when possible. Tokyo’s neon can throw off auto WB, creating unnatural skin tones. Custom Kelvin settings around 3200K–4000K work well for neon districts, while 4500K–5000K suits lantern-lit areas like Asakusa. With these adjustments, you’ll maintain both accurate colors in the kimono and the vibrancy of the Tokyo skyline.


In conclusion, optimizing Sony camera settings is about balancing technical precision with creative vision. Aperture, ISO, shutter speed, and white balance all interact to tell the story of the city at night. Mastering these allows photographers to confidently deliver Tokyo night photography sessions that glow with authenticity, romance, and professional polish.


FAQ – Tokyo by Night: Romantic Illuminations & Engagement Photography Hotspots

  1. Where are the most romantic places in Tokyo for night photos?

    Popular spots include Tokyo Tower, Rainbow Bridge in Odaiba, and Shibuya Sky Observatory. These locations combine city lights with intimate vibes perfect for engagement photography.


  2. Can I do a couple photoshoot in Shinjuku or Shibuya at night?

    Yes! Both neighborhoods are famous for neon-lit streets and cinematic backdrops. Many couples book a Tokyo night photographer to capture candid and posed shots here.


  3. Do I need a professional photographer for Tokyo night portraits?

    Smartphones struggle with low light. Hiring a Tokyo-based photographer ensures your engagement or couple photos look sharp, colorful, and timeless. Book a Tokyo night photoshoot here.


  4. What’s the best time for night photography in Tokyo?

    Blue hour (just after sunset) and later evening (when neon lights are brightest) are ideal. Photographers often suggest shooting between 6:30 PM – 9:00 PM.


  5. Is it possible to wear a kimono for a night engagement session?

    Yes, kimono rentals are available in Asakusa, Shinjuku, and Shibuya. A kimono photoshoot against Tokyo’s glowing skyline adds cultural elegance to modern couple photography.


  6. Which Tokyo landmarks look best illuminated at night?

    Tokyo Tower, Skytree, Shinjuku Kabukicho, and Rainbow Bridge are most requested by couples. Many book multiple spots in one session for variety.


  7. Are night family photoshoots in Tokyo recommended?

    Absolutely! Families often choose Odaiba or Tokyo Tower for relaxed evening sessions, where children can enjoy the lights and open spaces.


  8. How much does a Tokyo night photography session cost?

    Rates vary depending on time and package, but professional Tokyo photographers typically charge ¥35,000–¥90,000 per session. See Soredenacho’s packages here.


  9. Can I book a last-minute night photoshoot in Tokyo?

    Yes, but availability depends on the season. During peak travel times like cherry blossom (March–April) and autumn foliage (November), night photo sessions in Tokyo fill up quickly. It’s best to book at least 2–3 weeks in advance, but some photographers accept last-minute inquiries if their schedule allows.


  10. What season is best for Tokyo night engagement photograph?

    Each season has its charm:

    Spring: Cherry blossoms lit up at night (yozakura) are magical.

    Summer: Tokyo Bay fireworks and Rainbow Bridge views.

    Autumn: Crisp air and fewer crowds, perfect for Shibuya or Shinjuku.

    Winter: Illuminations like Roppongi Hills Keyakizaka and Tokyo Midtown Lights create a festive, romantic backdrop.


  11. How can couples avoid crowds during Tokyo night photography?

    Choose slightly off-peak times like weekdays after 8 PM, or locations outside central hubs (e.g., Nakameguro riverside or Odaiba Seaside Park). A local Tokyo photographer can also guide you to hidden spots where you’ll still get neon and skyline views without heavy foot traffic.


  12. Are Tokyo night photoshoots safe in busy areas like Shibuya Crossing?

    Absolutely! Tokyo is one of the safest cities in the world. Professional photographers are experienced in managing gear and couples in crowded areas, ensuring your session runs smoothly even in iconic locations like Shibuya Crossing or Kabukicho.


  13. Do photographers in Tokyo provide edited images or just raw files?

    Most professional photographers in Tokyo including Sore de Nacho deliver carefully edited, high-resolution photos. Edited photos enhance colors, contrast, and the glow of Tokyo’s night lights, ensuring your engagement portraits look professional and timeless.


Nacho (Sore de Nacho Photography) is a professional photographer based in Tokyo, specializing in couple portraits, engagement sessions, and family photography across Japan. With years of experience capturing Tokyo’s neon-lit streets, romantic landmarks, and cultural charm, he helps travelers create timeless visual stories. From Asakusa’s traditional kimonos to Shibuya’s dynamic nightlife, Nacho blends candid emotions with artistic cityscapes.


👉 Ready to capture your Tokyo night memories? Book your session with Sore de Nacho.


What are the best Tokyo day trips for engagement photography sessions in Japan?

Tokyo offers a wealth of opportunities for engagement photography, but for couples who want to step outside the urban bustle, day trips from Tokyo provide dramatic natural and cultural backdrops that elevate engagement and couple photo shoots.


Whether you’re shooting in lush mountain landscapes, by serene lakes, or historic shrines, these locations can turn a simple session into an unforgettable photographic journey. As a Sony-shooting photographer, I particularly value the way natural light changes during a day trip soft morning mist or sunset glow can make engagement portraits feel timeless and cinematic.


One of the top choices is Hakone, reachable in about two hours from Shinjuku. Hakone’s Lake Ashi with its iconic torii gate and Mount Fuji in the background offers a classic, romantic setting, while the surrounding forests and hillside views allow for diverse compositions from lakeside silhouettes to forest canopy shots. The Hakone Shrine and Onshi Hakone Park give photographers options for shrine gates, pathways framed by cedar trees, and reflections in water ideal for moody or dreamy portraiture.


Another fantastic option is Kawaguchiko / Lake Kawaguchi, where Mount Fuji sits majestically behind the lake especially helpful for twilight or reflection shots that capture couples and nature in harmony. Some photography services and day tours (like the Mt. Fuji & Hakone Photo Excursion) offer guided shoots that optimize timing, framing, and lighting to harness Fuji’s presence.


When planning, it helps to consider seasonal timing cherry blossom season, autumn foliage, or early morning mist can each transform a location, offering unique photo moods. Balancing travel time with shooting time is key: starting early ensures you avoid crowds and capture soft light.


Finally, it's worth noting that a day-trip shoot often means juggling logistics: transportation, outfit changes, kimono rentals, and booking the photographer in advance. Taking those into account early can save valuable shooting time and result in smoother sessions. A pre-planned itinerary that includes travel, changing, shooting, and breaks gives the best outcome especially for couples who want both urban Tokyo shots and scenic natural portraits in one day.


Which nearby towns from Tokyo offer scenic backdrops for couple photo shoots?

If you’re based in Tokyo but craving scenic variety beyond cityscapes, there are several charming towns just a short train ride away that serve as beautiful backdrops for couple photography. These towns feature a mix of traditional architecture, natural landscapes, and seasonal beauty, perfect for creating varied and striking couple portraits. As a Sony camera shooter, framing these settings with different lenses from wide to portrait makes for dynamic storytelling across different locations.

  • Kawaguchiko (Lake Kawaguchi): With Mount Fuji reflected in Lake Kawaguchi, charming lakeside parks, and colorful seasonal landscapes, Kawaguchiko offers a romantic setting for calm, reflective couple shots. The mix of water, mountain, and forest gives photographers multiple textures and light conditions to experiment with.


  • Kawagoe (“Little Edo”): This historic town north of Tokyo is famous for its preserved Edo-period merchant streets, bell tower, and old warehouses. The nostalgic atmosphere is ideal for couples who want more vintage or historical portrait styles, especially in kimono outfits or classic attire.


  • Atami or Izu Peninsula: Coastal towns with seaside views, small harbors, and cliff-side walking paths. They’re quieter than major tourist hubs and offer dramatic sea and sunset light great for golden-hour couple photography by the water.


  • Yokohama’s Yamate / Motomachi district: Elegant hillside neighborhoods with Western-style architecture, gardens, and quiet roads. These districts provide variety a mix of European buildings and Japanese gardens as backdrops.


  • Odawara / Enoura Observatory: Odawara has traditional castle ruins and coastal scenery, and the Enoura Observatory, an art-meets-nature hillside exhibition space, provides a minimalist and architectural landscape that contrasts nicely with softer couple portraits.


These towns each carry distinct visual personalities, so selecting your locations depends on the mood you want: natural vs historical, serene vs dramatic, or coastal vs forested. Travel time is relatively short, making them ideal for a half-day or full-day couple photo trip outside Tokyo. Pro tip: always check local timing, crowd levels, and weather before scheduling your shoot.


How to plan a kimono photo session on a day trip from Tokyo?

A kimono photo session adds a uniquely Japanese aesthetic to a couple or engagement shoot, and arranging one on a day trip from Tokyo requires careful planning to make the most of the opportunity. From picking your kimono style, to booking the rental and photographer, to timing your shoot for ideal light each step influences the final outcome. With Sony camera gear, kimono textures and color contrasts can look stunning, but they also benefit from soft lighting, cautious posing, and location choices that complement traditional dress.

Quick Planning Checklist:

  • Reserve kimono rental: Places like Kimono Rental & Photography Mizuki in Asakusa or INKIMONO provide rental plus styling, and some offer guided walks or photoshoots.


  • Book the photographer in advance: Securing a photographer who specializes in kimono portraiture (and who shoots with Sony gear) ensures you have someone familiar with the challenges and opportunities of kimono sessions: folds, movement, sleeves, and lighting.


  • Choose your photo locations: Decide whether to stay in Tokyo (e.g. Asakusa temple areas, Rikugien Garden) or travel to towns like Kawagoe for historical streets or Hakone for natural backdrops. Lighting, crowds, and background aesthetics are key.


  • Plan for outfit and schedule timing: Kimono sessions often take longer for dressing and walking, so factor time for hair, makeup, changing, and transport especially if you’re moving between locations.


  • Check the weather and lighting: Overcast days, early morning, or late afternoon light tend to flatter kimono fabrics and reduce harsh shadows. Bring a small umbrella or consider backup locations if rain is forecast.


When thoughtfully planned, a kimono photo session can transform a simple day trip into a rich storytelling experience melding traditional Japanese attire with beautiful scenery and lasting memories. As a photographer using Sony cameras, the detail in kimono patterns and color gradations offers a great opportunity for capturing texture, movement, and emotion beautifully.


But success depends on timing, coordination, and location selection so outlining your itinerary in advance and allowing flexibility will help you create authentic and elegant images that truly highlight the kimono and the couple. If you’re considering booking a photographer or kimono rental for a one-day trip from Tokyo, reach out early to confirm timing, location permissions, and styling logistics to ensure a seamless shoot.


Where can you do kimono family photo sessions in Japan outside Tokyo?

Family photo sessions in kimono have become increasingly popular for those who want to capture traditional Japanese aesthetics in a more relaxed, generational context. While Tokyo has many urban kimono studios and walk-through spots, traveling outside the city gives families access to quieter, more scenic settings: temples, gardens, countryside and allows more freedom for candid and formal portraits without the hustle of city crowds.

Location Options for Kimono Family Shoots

  • Kawagoe (“Little Edo”): With its nostalgic merchant street architecture, old-school bell tower, and Edo-style storefronts, Kawagoe provides a rich historical backdrop that pairs beautifully with family kimono sessions. Parents, children, and grandparents in traditional dress look natural and elegant against the preserved crystalline lanes.


  • Hakone and Lake Ashi: Lakeside Hakone Shrine, forested trails, and views of Mt Fuji create a peaceful, nature-based setting ideal for multi-generational portraits. The contrast between kimono colors and natural backgrounds—trees, water, mountain—helps each person stand out without overwhelming the frame. Moreover, quiet paths mean families can take their time and vary poses more comfortably.


  • Kawaguchiko / Fuji Five Lakes: Open spaces, lakeside piers, and mountain reflections give families room to move and interact naturally, leading to more organic, relaxed portraits that catch candid interactions kids running, parents walking, and couples standing side by side, all within one frame of Mount Fuji.


  • Asakusa temple gardens or old neighborhoods: While still technically in Tokyo, the temple grounds and quiet side streets around Asakusa can feel rural or historical, especially early in the morning making them a fallback option if travel outside Tokyo isn’t feasible.


  • Local botanical gardens or quiet parks near Hakone or Odawara: Places like the Hakone Botanical Garden of Wetlands offer lush greenery, floral variety, and walking paths that are family-friendly and visually rich for portrait sessions.


When planning a kimono family photo session outside Tokyo, consider factors like travel time, location permissions, crowd levels, and timing (morning or late afternoon tends to be best). For families with young children or older relatives, quieter, more spacious locations are usually more comfortable and less stressful. Allowing time for posing, movement, breaks, and outfit adjustments will help create relaxed, natural photos rather than rushed, stiff poses.


Booking a local photographer who understands both kimono portraiture and outdoor lighting can make a big difference in capturing genuine interactions and beautiful compositions in family kimono sessions.


What day trips from Tokyo are ideal for cherry blossom couple photography?

Cherry blossom season in Japan turns landscapes into pastel dreams, and for couples, it offers an ideal window for engagement, couple, and romantic portrait photos. While Tokyo has many cherry blossom hotspots (like Shinjuku Gyoen or Meguro River), venturing out on day trips from Tokyo can provide more serene, expansive, and less crowded environments, often with better framing and lighting for photography sessions.


The timing of blossoms (sakura) typically peaks in late March to early April in Tokyo, but depending on altitude and latitude, locations like Hakone or Fuji Five Lakes might bloom slightly later, giving you options for extended shooting windows.


One of the top destinations is Hakone the area around Lake Ashi, Hakone Shrine, and Sengokuhara Pampas Grass fields can still feature cherry blossoms or early spring foliage, especially at lower elevations. The combination of lake reflections, shrine paths, and blossoming trees provides varied backdrops that can give your couple photographs contrast between soft floral color and rugged natural features.


Another excellent option is Kawaguchiko / Lake Kawaguchi, where cherry trees are interspersed with lakeshores and Mount Fuji views, creating layered compositions: blossoms in the foreground, water mid-ground, and mountain in the background. Depending on the year, cherry blossom timing may slightly lag behind Tokyo’s, allowing a later shooting window for couples who can’t make it to Tokyo at the very beginning of sakura season.


For couples preferring historic ambiance, Kawagoe can also hold cherry blossoms along its canal and old streets, offering a nostalgic feel even when sakura bloom might be slightly earlier or later than Tokyo. The juxtaposition of cherry blossoms with old wooden architectures brings a timelessness to couple photography.


If weather or timing isn’t favorable in Tokyo, Yokohama or Odawara may offer alternative cherry blossom spots, especially in neighborhood parks or castle gardens, often with fewer crowds and more flexibility for comfortable photographing. When planning cherry blossom couple photography, it's essential to monitor blossom forecasts, plan for lighting (morning or late afternoon light is gentler), and arrive early before crowds.


Having a backup location or shooting day can help if blooms are delayed or weather turns. Booking a photographer familiar with cherry blossom timing, light, and posing will greatly improve your chance of getting beautiful, soft, romantic images.


Which Japanese hot spring towns near Tokyo are perfect for romantic photo sessions?

Near Tokyo, hot spring (onsen) towns provide a relaxing and atmospheric backdrop for romantic couple portrait sessions. The blend of steam, traditional architecture, forested hills, and occasional mist gives hot spring resorts a dreamy quality perfect for couples looking to blend intimacy with scenic beauty.


As a Sony photographer, I love how the soft light and atmospheric steam in places like Hakone enhance kimono or casual outfits, making colors pop and adding texture to the background:

  • Sengokuhara or Gora region in Hakone: The pampas grass fields, mountain trails, and quiet paths near hot spring hotels provide secluded spaces for romantic strolls and portraits, especially when the steam from onsen pools is rising in the cool air.


  • Izu Peninsula hot springs (e.g. Shuzenji Onsen): Though slightly further, some Izu onsen towns offer riverside baths, bamboo groves, and historic inns that make for elegant backdrops ideal if you want a mix of water, greenery, and traditional Japanese inn architecture.


When planning a romantic onsen photo session session outside Tokyo, timing and preparation matter: early morning or late afternoon light tends to soften steam and avoid crowds, while warmer midday steam can create haze that diffuses sunlight.


Booking a hotel or ryokan with private open-air onsen can also give couples more privacy for relaxed shooting in kimono or casual outfits. And importantly, plan ahead for photography permissions or location regulations within ryokan grounds some hot spring resorts require advance notice or have restrictions on tripods or changing outfits outdoors.


If you’re a couple considering a kimono or casual couple portrait session in a Japanese hot spring town, arriving with a clear itinerary, camera settings plan, and awareness of changing conditions will help you capture soft, romantic, and timeless images.


How far should you travel from Tokyo for rural engagement shoots with Sony photography gear?


Deciding how far to leave Tokyo for a rural engagement shoot involves balancing travel time, scenery quality, lighting conditions, and logistics. Rural areas whether mountain villages, quiet lakesides, or forest paths bring peace, natural light, and visual simplicity that can let the couple and their emotions shine.


For a Sony photographer, these settings offer rich texture opportunities leaf patterns, misty fields, and natural backlight enhance skin tones and add depth to portrait compositions. But longer journeys can eat into shooting time, so it’s important to plan carefully.


Locations within about one to two hours from Tokyo such as Hakone, Kawaguchiko, or even small villages along the Chichibu region offer a sweet spot: they are close enough for a day trip yet far enough to escape urban clutter. This timeframe often gives you enough flexibility for outfit changes, walking between photo spots, and time for the couple to relax and enjoy the moment.


On the other hand, venturing farther say, to the Japanese Alps or distant coastal village can give you spectacular backdrops of mountains or rural life, but they’re better suited for overnight or multi-day trips to avoid rushed sessions.


When traveling to rural locations, bring extra gear and plan for light changes: for example, a Sony full-frame body paired with a fast prime lens can perform beautifully in low light, but having a reflector or portable diffuser helps manage harsh midday sun or create fill light in forested areas.


You also want to consider weather changes rural areas may have more fog, rain, or wind, so backup shooting locations and flexible schedules help. Lastly, checking transport schedules whether local buses, trains, or car rental is essential so you don’t get stuck far from your shooting site or have limited time for key lighting (like golden hour or sunset).


If you’re considering a rural engagement shoot outside Tokyo, my recommendation is to keep travel times under three hours for a day trip, and focus on areas with guaranteed scenic quality and flexible lighting. But if you’re planning a kimono or cinematic shoot and want full freedom to roam and shoot at sunrise, sunset, or deep in nature, then staying overnight is worth it. This balance between distance and shooting freedom will determine whether your session feels rushed or becomes a relaxed, immersive portrait experience.


What are the logistics of booking a Tokyo engagement session on a day trip to Hakone?

A day trip from Tokyo to Hakone for an engagement photo session can feel like a mini adventure combining scenic lakes, forests, and traditional shrines with portrait time in nature.


But pulling off a successful engagement session in Hakone requires solid logistics: scheduling transportation, timing for light, outfit changes, shooting locations, and ensuring the photographer is booked and aware of the day’s plan.


Without a clear plan, a day that was meant to feel relaxed can become rushed, stressful, and crowded, which shows in the photos.

  • Train and transportation timing: The standard route is via the Odakyū or JR lines to Odawara or Hakone-Yumoto, then onwards using local transport or buses. Plan for travel, rest stops, and transfer times so you’re not rushed during shooting.


  • Shutter-to-shoot time and location scheduling: Decide which locations you want to shoot first (e.g. Lake Ashi, Hakone Shrine, Onshi Hakone Park). Map these in a logical order to minimize backtracking and optimize golden hour timing.


  • Outfit and kimono change planning: If you’re doing outfit changes or a kimono session, factor in time to change, walk between locations, and adjust hair or accessories. Confirm whether changing space is available at ryokan or designated dressing areas.


  • Permits or permissions: Some scenic sites like Hakone Shrine or lakeside piers may require advance permission for portrait photography, tripod use, or commercial photo sessions especially when using professional gear.


  • Photographer booking and coordination: Secure your photographer well in advance, clarify meeting points, timeline, editing expectations, and whether they bring lighting or lens kits. Communicate your travel plan so they can suggest timing and location adjustments.


The most successful Tokyo to Hakone engagement sessions tend to be those with clear scheduling, early starts, flexible shooting plans, and advance preparation for outfit changes and location permissions. Couples should aim to start early catching morning mist at Lake Ashi or shrine gates before crowds arrive and allow breaks for changing and relaxing.


A photographer familiar with Hakone will be invaluable, helping you navigate lighting changes, suggesting the best angles, and adjusting for weather. If done well, a one-day trip to Hakone can deliver both tranquil lakeside portraits and dramatic backdrop shots capturing a full narrative of the couple’s connection with Japanese nature and scenery.


Which seaside areas near Tokyo are best for sunset couple photography sessions?

Sunset sessions by the sea bring a magical quality to couple portraits golden light, water reflections, and open horizons add emotion and visual depth to romantic photos. Choosing the right seaside destination near Tokyo can make or break the mood: whether it’s a quiet fishing beach, a pier overlooking Tokyo Bay, or a cliffside overlooking the ocean, each location has its own ambience. The key is to pick a spot that balances natural light, access, and crowd levels especially if you’re planning a styled shoot or kimono session.

Recommended Seaside Locations:

  • Enoshima and Kamakura Coast: These spots are a well-known choice for sunset photography. The island of Enoshima, its lighthouse, and adjacent beaches offer options for shoreline walking shots, pier photos, and cliffside silhouettes. Kamakura has old shrines and small beaches that catch the warm evening light beautifully.


  • Yokohama / Osanbashi Pier: Osanbashi Pier provides a dramatic pier setting with Tokyo Bay, Rainbow Bridge, and city skyline in the background offering contrast between urban silhouettes and open water. This juxtaposition can be striking for couples dressed in modern or traditional attire.


  • Katsuura or Kujūkuri Beach (Chiba): These longer, more rural beaches offer quieter, open spaces ideal for capturing wide horizon sunset shots, gentle waves, and natural sand textures. Kujūkuri in particular gives a more expansive feeling, and though it’s farther from Tokyo, its open ocean view is unmatched.


  • Odaiba Seaside Park: While technically in Tokyo, Odaiba’s man-made beach and seaside promenade are a popular destination for sunset watchers, with views of the Rainbow Bridge, Tokyo skyline, and a relaxed water-front ambiance though it can be busier, which means planning your time and positioning is important.


When planning a sunset couple photography session by the sea, try to arrive at least an hour before sunset to capture “golden hour” lighting, and consider bringing a reflector or diffuser to soften harsh light on faces. If you're photographing a kimono session, watch for tide times and windy conditions, which could affect dress movement or comfort.


Shooting later during “blue hour” can also offer beautiful soft lighting, but requires careful exposure settings or a tripod. Ultimately, choosing a location that matches your couple’s style beachy, architectural, rustic, or urban will help deliver a photo session that feels intentional and emotionally resonant.


Where can you rent kimonos and hire a photographer on a Tokyo day trip for family or couple portraits?

If you’re planning a one-day trip out of Tokyo and want to wear a kimono for a family or couple portrait session, having easy access to kimono rental and a reliable photographer is essential. Tokyo offers a number of rental shops, styling services, and photography studios, but combining them smoothly on a day trip especially outside Tokyo takes coordination.


The ideal scenario is finding a rental provider that offers dressing, styling, and possibly a photographer or walking tour guide so you don’t have to rush between locations or change outfits in inconvenient places.


After dressing, clients can head out to photo spots or meeting points with their photographer. Some shops even offer in-house or partnered photography services so that the whole session from dressing to shooting is seamless.


For day trips to nearby towns such as Kawagoe, Hakone, or Kawaguchiko you’ll want to look for rental shops and photographers that can either transport or meet you on site. Some kimono rental companies have branches in these towns or offer pick-up / meet-up services, while mobile photographers can travel with you and shoot on location.


Confirming in advance whether the rental shop allows you to wear the kimono outside, or whether you’ll need to change back before returning, is important especially if you’re traveling by train or bus.


When booking both the kimono rental and photographer, communicate clearly about your itinerary, how many outfit changes you plan, your photo shoot locations, and your return schedule. This ensures that the photographer brings the right lens kit, lighting equipment, and has enough time for outfit changes, walking between spots, and rest breaks.


Also, check whether your photographer is comfortable shooting kimono family photo sessions or outdoor kimono portraiture, as the flow and posing differ significantly from modern dress shoots. On the day, a well-prepared plan means less time changing or traveling, and more time creating beautiful, relaxed portraits in kimono that capture the essence of family or couple connections.


Tokyo’s kimono rental shops and photography providers offer great flexibility, but successful day-trip portrait sessions hinge on well-coordinated scheduling, location planning, and service arrangements. If you’re planning to travel to Hakone, Kawagoe, or Kawaguchiko for a one-day kimono portrait session, look for combined packages kimono styling, hair & makeup, dressing, and photographer travel.


Double-checking that the kimono shop allows outdoor use, that there’s a place to change clothes comfortably, and that the photographer is familiar with kimono sessions will save time and reduce stress. By booking ahead and sharing your full itinerary, you can ensure your day-trip photo session becomes a smooth, relaxing, and deeply meaningful memory with stunning visuals to match.


FAQ - Tokyo by Night: Romantic Illuminations & Engagement Photography Hotspots


1. What are the best night photography spots in Tokyo for couples?

Some of the most popular locations include Tokyo Tower, Tokyo Skytree, Shinjuku Kabukicho neon streets, and Odaiba’s Rainbow Bridge. These places offer breathtaking views that combine modern lights with romantic settings perfect for couples’ photography.


2. Do I need to hire a professional photographer in Tokyo?

While anyone can take photos with a smartphone, hiring a Tokyo engagement photographer ensures you capture cinematic-quality images while enjoying your evening stress-free. Professionals know the timing, angles, and hidden spots to create unforgettable memories.  


3. Which Tokyo illuminations are most romantic for proposals or engagement shoots?Seasonal events like Tokyo Midtown Christmas Illumination, Shibuya Blue Cave, and Roppongi Hills Winter Lights are especially popular. They provide dazzling, fairy-tale atmospheres that many couples choose for surprise proposals or engagement photoshoots. These spots can be crowded, so plan your visit on weekdays or later in the evening.


4. Can we combine sightseeing and an engagement shoot at night?

Yes! Many couples love to blend sightseeing with a photoshoot at locations like Asakusa Sensoji Temple after dark, followed by Tokyo Skytree views. A half-day or evening session allows you to explore iconic sites while capturing professional images that reflect your love story.


5. Is Tokyo or Kyoto better for romantic night photography?

Tokyo shines with futuristic neon and glittering skyscrapers, while Kyoto offers lantern-lit streets and historic temples. If you want modern, urban romance, Tokyo is unbeatable. If you prefer traditional and cultural vibes, Kyoto is a dream setting. Many couples actually book both cities to enjoy contrasting atmospheres.


6. Do I need permits for night couple photography in Tokyo?

In most public spaces like parks, shopping districts, or streets, photography is allowed without permits. However, some indoor or commercial venues may require prior approval. A local photographer can guide you on where permits are needed to avoid complications.


7. What should we wear for a night engagement photoshoot in Tokyo?

Couples often choose elegant outfits dresses and suits that pop against the city lights. For winter, coats, scarves, and gloves add both warmth and style. Some couples even rent kimono for night shoots at temples or shrines for a unique blend of tradition and romance.


8. Can we book last-minute couple photoshoots in Tokyo?

It’s possible, but popular dates (especially during sakura or illumination festivals) fill up quickly. To avoid disappointment, it’s best to book your Tokyo couple photography session in advance.


9. How much does a couple photoshoot in Tokyo at night cost?

Prices vary depending on duration and package, but on average, a professional Tokyo couple photographer charges between ¥30,000–¥60,000 for a 1–2 hour session. Some include edited photos, outfit guidance, and location planning.


10. Can I do a surprise proposal photoshoot in Tokyo at night?

Absolutely! Many clients plan surprise proposals under Tokyo Tower or Shibuya’s Blue Cave illuminations. Your photographer can help coordinate the perfect timing and even hide in the crowd to capture the exact moment.


11. What are the best seasonal illuminations in Tokyo for couple photography?

  • Winter: Roppongi Hills & Marunouchi Christmas Lights

  • Spring: Tokyo Tower with sakura at Zojoji Temple

  • Summer: Odaiba Rainbow Fireworks reflections

  • Autumn: Rikugien Garden autumn leaves light-upEach season offers unique romance-filled backdrops.


12. Is it safe to do night photoshoots in Tokyo?

Yes! Tokyo is one of the safest cities in the world, even at night. Popular photography spots like Shinjuku, Shibuya, and Odaiba are well-lit and busy. Still, working with a local photographer helps you avoid crowded times and discover peaceful romantic corners.


13. How many edited photos will I receive from a Tokyo engagement shoot?

It depends on your package. Most photographers deliver between 40–80 edited high-resolution images for a 1–2 hour session. Premium packages may include photo albums or cinematic short videos.


14. Do photographers in Tokyo speak English?

Many professional photographers in Tokyo, especially those working with international couples, are fluent in English. 👉 At Sore de Nacho, communication is easy, making the planning stress-free for overseas clients.


15. Can I rent outfits for a night couple photoshoot in Tokyo?

Yes. Tokyo has many kimono rental shops in Asakusa and Shinjuku, and some photographers collaborate with dress rental boutiques. Wearing a kimono at night in front of lantern-lit temples can add a magical touch to your photos.


Author Bio

Nacho is a Tokyo-based professional photographer specializing in engagement, proposal, and couple photography sessions across Tokyo, Kyoto, and Japan. His style combines cinematic lighting, candid emotions, and iconic Japanese backdrops such as Tokyo Tower, Shibuya, and Kyoto’s Gion.


Over the years, Nacho has helped hundreds of couples create timeless memories during their Japan trips. Whether you’re planning a surprise proposal under the Shibuya Blue Cave lights or a romantic engagement shoot at Tokyo Skytree, Nacho makes every session stress-free and unforgettable.


👉 Ready to capture your love story in Japan? Book your Tokyo night photoshoot with Soredenacho here.


What are Kyoto’s most photogenic proposal spots for a surprise engagement?

Planning a surprise proposal in Kyoto means choosing a setting that’s not only romantic but also visually stunning especially if you want those once-in-a-lifetime photos to turn out beautifully when shooting with a Sony camera. As a photographer experienced in “photography sessions in Japan” and “proposal photography in Kyoto,” I always scout locations that offer both privacy and picture-perfect backdrops.


Kyoto’s mix of historic temples, quiet shrines, lush gardens, and bamboo groves makes it an ideal city to stage a dreamy engagement moment and capture it with soft, natural light. But not all spots are created equal some get crowded, others offer hidden corners just right for that surprise knee drop. Let’s walk through a curated list of spots that combine visual allure and emotional intimacy.

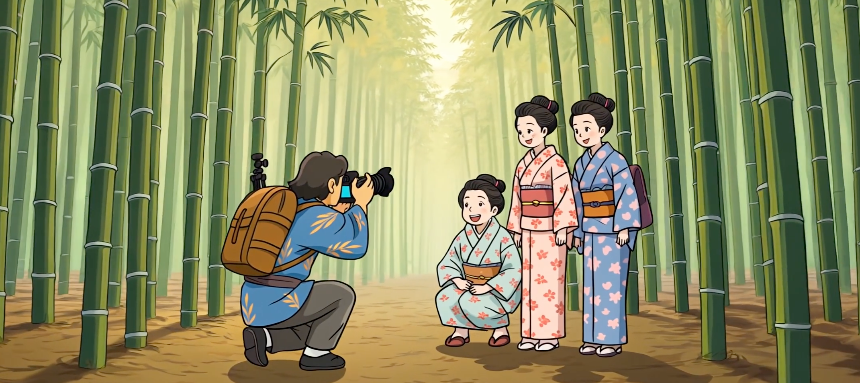
  1. Arashiyama Bamboo Grove: Iconic tall bamboo stalks create vertical lines that frame the couple beautifully, and the soft filtered green light is perfect for Sony’s wide-dynamic-range sensors. Morning visits (before 8 AM) are best to avoid crowds. Flytographer lists it as a top Kyoto proposal location.


  2. Nonomiya Shrine in Arashiyama: A small, serene Shinto shrine near the bamboo forest, often quiet and less touristy, with mossy grounds and a quaint torii gate that add depth to candid moments.


  3. Heian Shrine and its garden pond: The large red torii gate and elegant pond garden offer vivid color contrasts ideal for Sony mirrorless lenses, especially during late afternoon light.


  4. Maruyama Park and Yasaka Pagoda / Higashiyama District: Cherry blossoms or autumn leaves behind Yasaka Pagoda provide beautifully layered backgrounds. Maruyama Park’s iconic weeping cherry tree is especially romantic at dusk.


  5. The outer gardens of the Kyoto Imperial Palace or Kyoto Botanical Garden: These green expanses offer open space and clean lines, giving couples room to move and photographers flexibility for wide-angle or full-body shots. The Kyoto Botanical Garden is less frequented by tourists, making it a good choice for quiet proposal photos.


Choosing the right spot is half the battle in planning a dream proposal in Kyoto and from a photographer’s perspective, it’s also about framing the moment so it looks spontaneous, timeless, and emotionally genuine. With a little scouting and Sony gear in hand, those surprise yes-moments will turn into stunning keepsakes.


How to time a Kyoto proposal photoshoot for soft light and fewer crowds

Planning the perfect timing for a Kyoto proposal photoshoot means balancing the light, the crowd, and the weather three key ingredients that can make or break your engagement photos. As a Sony shooter who often leads photography sessions in Japan and specifically proposal photography in Kyoto, I’ve learned that timing is everything. In Kyoto, the light during golden hour shortly after sunrise or before sunset gives a soft, warm glow that flatters skin tones and architectural details, while minimizing harsh shadows.


If you're proposing at places like Arashiyama or the Philosopher’s Path, arriving before sunrise or very early in the morning is critical. Tourist foot traffic hasn’t yet arrived, and the cool morning mist often lingers, creating a dreamy atmosphere around bamboo shoots or temple walkways. Flytographer and other proposal planners often recommend starting shoots around 6 AM.


Similarly, late afternoon, about 90 minutes before sunset, can work well especially in wooded temple gardens because the light filters low through trees and the visitor numbers often thin out. However, the risk is that light may drop too quickly, so quick camera adjustments are essential. Shooting with a Sony mirrorless body with fast lenses (f/1.4–f/2.0) and ready ISO adjustments will help preserve detail even as light fades.


Weather also plays a big role: proposal shoots during cherry blossom season (late March to early April) or autumn leaf season (November) can be visually spectacular but unpredictable rain, wind, and crowds can all complicate a surprise proposal. Checking the daily forecast beforehand and having a rain cover or alternate plan can save your shoot.


Ultimately, timing your proposal photoshoot around light, crowd flow, and weather can distinguish a rushed snapshot from a magical moment beautifully captured.


How can a Sony photographer capture candid proposal moments in Kyoto

Capturing a candid proposal in Kyoto is an art: it’s about preserving the surprise, emotion, and authenticity of the moment while blending seamlessly into the surroundings. As a photographer shooting with Sony gear, I rely on a combination of planning, discreet positioning, and technical readiness to ensure that every glance, reaction, and joyous expression is caught without being intrusive.


Kyoto’s mix of traditional architecture and natural landscapes provides both challenges and opportunities: temple corridors, bamboo groves, and garden paths each demand different approaches to lighting, framing, and timing.


Before the proposal, I walk through the chosen site whether it’s a shrine, garden, or quiet street looking for vantage points and escape routes so I can move unseen and anticipate when the moment will unfold. I also synchronize with the proposer (via subtle cues or pre-arranged signals) so I know exactly when to switch from observing to shooting mode.


Having a Sony mirrorless camera with silent shutter mode and a fast prime lens (such as a 35mm f/1.8 or 50mm f/1.4) ensures that I can shoot in low light with natural-looking bokeh, without distracting or rustling around.

  • Use silent shutter and autofocus tracking to capture genuine reactions without noise or fuss


  • Frame the shot from a slight distance or behind a natural element (e.g. tree branch, pagoda pillar) to preserve surprise


  • Be ready with continuous burst mode so you can capture the build-up, the question, and the immediate emotional reaction


Once the proposal is done, the real magic begins those first emotional moments right after the “yes” are often the most touching. I quickly switch from candid shooting to a more guided portrait style: a few short prompts (“turn to each other,” “look into each other’s eyes,” “walk slowly”) help couples relax and let the shock and excitement settle into smiles and embraces. The goal is to preserve that emotional afterglow in a way that feels natural, not staged.


Afterward, I usually suggest a short walk or gentle stroll so the couple can decompress and we can capture spontaneous interaction: adjusting clothes, wiping away unseen tears, or simply laughing together. These transitional shots often become favorite frames because they tell a quieter part of the story moments when the excitement is still sinking in, and everything feels wonderfully surreal.


Finally, when reviewing the images back at my editing workstation, I tune the color balance, shadows, and highlights to enhance the warm tones of Kyoto’s wooden temples, golden light, and natural foliage without over-saturating preserving the authentic atmosphere of the day. The finished gallery aims to reflect not just the moment of the proposal, but the emotion, environment, and story that led up to it.


What should you know before booking a proposal photography session in Kyoto

Booking a professional proposal photography session in Kyoto can make your surprise engagement truly unforgettable but it also requires thoughtful planning. From obtaining location permits to discussing shot lists and timing, understanding a few key considerations in advance can help avoid last-minute stress and ensure that your photos come out beautifully. As someone who regularly leads photography sessions in Japan and organizes proposal photography in Kyoto, here are the most important factors I always review with clients before confirming a booking.

  1. Permits and shrine/temple rules: Many temples and shrines in Kyoto such as Heian Shrine, Nonomiya Shrine, and Nanzen-ji have rules regarding photography, tripods, and professional shoots. Securing permission or hiring a photographer familiar with local policies can prevent disruptions or fines.


  2. Timing and crowd management: As discussed earlier, the best images often come from low-crowd times early morning or off-peak seasons. Your photographer should help plan timing to avoid tourist congestion, especially during sakura or autumn foliage seasons.


  3. Backup weather and rain plan: Kyoto weather can change quickly, especially in spring and autumn. A clear rain plan whether that means alternate indoor locations, clear umbrellas, or a covered spot—can save the shoot when clouds or rain appear.


  4. Pre-shoot consultation: Discussing outfit choices, color themes, lighting preferences, and desired framing beforehand can help your photographer prepare their Sony camera settings, choose lenses, and scout angles in advance. Sharing mood boards or example images helps align expectations.


  5. Post-proposal shoot options: Decide if you want to continue shooting after the proposal for engagement portraits, kimono walks, or celebration shots. Knowing this ahead of time affects booking length (30 min, 60 min, 90 min, etc.) and pricing. Flytographer’s Kyoto proposal packages, for example, offer extended time slots for post-proposal coverage.


By addressing these considerations early permits, timing, weather, consultation, and post-proposal plans you’ll be better positioned to enjoy a seamless and emotionally rich proposal shoot in Kyoto. Good planning lets the proposal moment and the photographs feel spontaneous, heartfelt, and truly yours.


How can a kimono photo session in Kyoto enhance a proposal shoot

Incorporating a kimono photo session in Kyoto into your engagement shoot can elevate the romantic atmosphere dramatically. The flowing lines, vibrant patterns, and traditional aesthetics of kimono add a timeless and culturally rich visual layer to your proposal photos. As a photographer specializing in kimono photo session in Japan and kimono family photo session in Japan, I’ve seen how a simple change in attire can transform a proposal shoot from casual to cinematic.


Wearing kimono amidst Kyoto’s historic streets Gion’s wooden machiya, the stone pathways leading up to Kiyomizu-dera, or even in Arashiyama’s bamboo grove creates a striking contrast between modern love and traditional Japanese backdrop. The elegant silhouette of kimono helps frame the couple naturally, especially when paired with Sony’s portrait lenses that render smooth bokeh and soft background blur. The result is a dreamy, almost painterly look that highlights both the environment and the emotional core of the proposal.


Renting kimonos in Kyoto is relatively straightforward: shops like Okamoto Kimono Rental or Rikawafuku offer full dressing services, accessories, and hair styling packages. If you plan a kimono shoot, it’s wise to reserve your outfit in advance especially during peak tourist seasons so you have enough time for dressing, photos, and walking to your proposal location. Although budget-friendly kimono rentals start from around ¥3,000–¥4,000, premium kimono sets with hairstyling may cost more, and dressing can take 30–60 minutes.


From a photographer’s viewpoint, you also need to consider how the kimono’s colors will work with Kyoto’s seasonal backdrops pinks in spring, fiery reds in autumn, or soft greens in summer. Choosing coordination wisely (e.g. pastel kimono against autumn foliage) ensures the clothes complement rather than clash with the surroundings. A well-coordinated kimono shoot can make the proposal itself feel like a moment out of time, beautifully blending tradition, emotion, and visual storytelling.


Where in Kyoto can you combine a proposal and a family photo session afterward

If your dream proposal in Kyoto includes not only a surprise moment for two but also a beautiful family photo session in Japan right after, choosing locations that offer both privacy for the proposal and space for relaxed family portraits is key.


I often recommend spots that transition naturally from an intimate engagement moment to a joyful group celebration, especially when shooting with a Sony mirrorless camera under natural light.


The ideal locations minimize tourist distractions while offering scenic variety so the session flows from proposal to family portraits without needing to change venues.

  1. Maruyama Park + Gion: Begin near the famous weeping cherry tree in Maruyama Park for the proposal, then stroll down into Gion district for family photos set against traditional machiya streets and lantern-lit alleys. The park’s open areas are great for wide-angle family shots, and Gion offers narrow street backdrops for more intimate compositions.


  2. Philosopher’s Path: A quieter canal-side walk shaded by trees creates a very peaceful environment for a proposal, followed by gentle walking photographs as a family. The gentle waters and bridges frame both proposals and group dynamics beautifully.


  3. Kyoto Botanical Garden: This is a good option for a low-traffic, green retreat within Kyoto, offering a variety of plants, open lawns, and riverbank views. After the proposal, you can relax on the lawns or walk along riverside paths to capture casual family interactions.


  4. Okazaki Park near Heian Shrine: This site includes gardens, ponds, and spacious lawns, making it ideal for a staged proposal under cherry blossoms or autumn foliage, then switching into family portraits with plenty of room for movement, seating, and varied lighting.


By carefully picking locations that serve both moments a private proposal and a relaxed family session you can create a seamless photographic journey that captures both the romance of the engagement and the warmth of family celebration. This planning helps the photographer stay mobile, adjust lighting smoothly, and tell a fuller story without rushing or relocating mid-shoot.


What are the best seasonal backdrops in Kyoto for proposal photography (cherry blossoms, autumn leaves, bamboo)

Kyoto’s seasonal changes from cherry blossoms in spring to fiery maple leaves in autumn and evergreen bamboo groves offer dramatic backdrops that can elevate a proposal photoshoot into a visually stunning love story. Understanding the timing, lighting, and crowd patterns for each season is especially important if you’re planning to shoot with Sony gear, as the changing colors and light levels affect exposure, white balance, and framing choices.

  1. Cherry Blossom Season (late March to early April): The soft pink and white blooms at places like Maruyama Park, Philosopher’s Path, and Heian Shrine frame couples beautifully, creating a dreamy, romantic atmosphere. However, these spots can become crowded mid-day, so early morning shoots are essential to avoid tourists and capture gentle light before the blossoms drift.


  2. Summer Green and Bamboo (June to August): The lush green hues at Arashiyama Bamboo Grove, wooded temple gardens, and forest trails provide a cool, serene backdrop. The vertical lines of bamboo stalks pair well with portrait compositions, and shooting with a Sony lens at moderate apertures helps balance detail and background blur. Light filtering through leaves can add beautiful dappled effects just watch for harsh midday sun.


  3. Autumn Leaf Season (late October to November): Kyoto’s momiji (autumn foliage) offers vivid reds, oranges, and yellows at Tofukuji, Eikando, and Daigoji Temple. The warm tones contrast nicely with simpler outfits or neutral tones, creating eye-catching visuals. But fallen leaves and increasing crowds can complicate the shoot, so scouting and timing are critical.


  4. Winter and Snow Scenes (December to February): While snowfall in Kyoto is rare, when it does come it transforms temple roofs, stone pathways, and gardens into a quiet, white wonderland. The muted tones of winter light and the subtle color palette make for very intimate, quiet proposal shoots especially if the couple is dressed in warm, contrasting attire.


  5. Rainy Season and Overcast Days: Rainy days or soft overcast skies can actually benefit proposal photography by offering soft, diffused light, muted colors, and reflections especially around pond surfaces at temples like Kinkaku-ji or pond walkways at Daigoji. Waterproof covers for gear and umbrellas can add atmosphere and storytelling elements to the images. But it’s essential to plan for weather, both practically and creatively.


Recognizing Kyoto’s seasonal rhythms and how they affect light, color, and crowd density will help you choose the optimal time for a proposal photoshoot that feels both magical and authentic. With Sony camera settings adjusted for each season, you can capture the emotional moment of proposal in a setting that feels both timeless and deeply rooted in Kyoto’s natural beauty.


How to coordinate outfits and lighting for a dream proposal shoot in Kyoto

Coordinating outfits and managing lighting are two fundamental but interconnected elements of planning a Kyoto proposal photoshoot especially for photographers using Sony mirrorless cameras with portrait or prime lenses. The right outfit colors and fabric choices can either harmonize with Kyoto’s seasonal backdrops cherry blossoms, autumn leaves, temple gardens or clash with them, while lighting decisions influence how those colors translate in-camera.


As a photographer, I often talk through outfit choices with my clients well in advance, helping them select tones and styles that complement both the location and lighting conditions for their shoot.


In Kyoto, soft natural lightwhether early morning or late afternoon is ideal for minimizing harsh shadows and preserving subtle color tones in outfits. But if a couple plans to wear kimonos or formal attire, the lighting must be adjusted thoughtfully so that deeper colors don’t turn muddy in shade or too bright in direct sunlight. Considering lighting and outfits together helps ensure that colors stay true, skin tones look natural, and textures (like kimono fabric or lace) are rendered with detail and elegance.

  • Choose outfit colors that contrast the location (e.g. pastel or neutral tones against autumn foliage) or harmonize with the setting (e.g. soft pinks during cherry blossom season)


  • Avoid overly busy patterns or reflective fabrics that may distract from the proposal moment or cause exposure issues in shaded areas


  • Test lighting scenarios ahead of time bring a flash or reflector, or trust your Sony’s low light performance to ensure that shadowed or backlit scenes remain well exposed


A few days before the shoot, I recommend couples do a quick wardrobe test: take a few smartphone or camera test shots in similar lighting conditions (shade, early morning, golden hour) to check how colors look and how fabric details show up. This helps avoid surprises on the day fabric that looks vibrant in a hotel lobby might wash out or darken under Kyoto’s tree cover or temple archways. Even small adjustments like swapping a bright red tie for a softer tone, or choosing shoes that won’t reflect sunlight can make a big difference in final images.


During the actual shoot, I often adjust my Sony camera’s white balance manually (or use custom settings) to match the lighting especially if the couple’s outfits include whites or pastels. Shooting in RAW allows me to fine-tune color balance and exposure in post-production, preserving detail in both clothing and skin tones without blowing out highlights or losing shadow detail.


If the couple is wearing a kimono or formal attire, I also watch for shadows cast by sleeves or folds posing adjustments or reflector use may be required to keep faces well lit and the outfit details clear.


Ultimately, well-coordinated outfits and lighting can transform a proposal from a simple gesture into a narrative image that feels cinematic, intentional, and deeply connected to Kyoto’s ambiance. When you plan outfits thoughtfully and adapt to lighting, your proposal photographs won’t just document a moment they’ll tell a story that resonates visually long after the “yes” has been spoken.


What are the insider tips for shooting a quiet, private proposal in Kyoto’s temples and gardens

Planning for a quiet, private proposal in Kyoto’s temples and gardens is about more than just picking a gorgeous site it’s about timing, cultural sensitivity, and subtle logistics. From the perspective of a Sony shooter experienced with proposal photography in Kyoto, I often recommend starting with a deep understanding of temple and garden traffic patterns.


Temples like Daigoji, Eikando, and Nanzen-ji have specific visiting hours, peak crowd times, and rules about photography. Entering before opening or during off-peak hours often results in serene backdrops and a sacred atmosphere that feels intimate and undisturbed.


When walking into temple grounds, it's essential to observe local etiquette. In Japan, photography is typically allowed on temple grounds, but often forbidden inside buildings, and the use of tripods or professional lighting gear may be restricted without prior permission.  


Being mindful of signs, shrine rules, and worshippers will help keep the flow of the shoot respectful and avoid any disruptions that could ruin the moment. Another insider tip is to plan subtle camera placement and movement in advance position yourself briefly behind a temple lantern, or along a garden path, so you can capture the proposal without startling the partner or drawing attention.


Scouting exit routes and alternate angles helps you stay mobile and unobtrusive, reacting quickly when the moment comes. As a Sony mirrorless shooter, I favor silent shutter mode and fast prime lenses so I can switch from wide candid frames to tighter emotional close-ups without being disruptive.


Finally, always bring a quiet fallback plan if a temple area becomes unexpectedly crowded, or if there’s a ceremony or group entering, it’s wise to have backup locations or signal cues so the proposer can pause and restart. Flexibility and cultural awareness can save both the mood and the visuals of the shoot. This kind of forethought allows the photographer to capture the surprise and emotional reaction without breaking the spell of the moment.


How to plan a surprise proposal in Kyoto without drawing attention from photographer’s perspective

From a photographer’s viewpoint, planning a surprise proposal in Kyoto involves a delicate balance between staging the moment and preserving its spontaneity. Especially when shooting with a Sony mirrorless camera, the goal is to blend into the scene: staying invisible enough to capture authentic reactions, but close enough to frame the emotional details like the look of surprise, the ring reveal, and the initial embrace without disrupting the moment.


Preparation and subtle coordination are key. In Kyoto where tourist density, temple security, and cultural expectations vary widely having a well-thought-out plan can mean the difference between a smooth, heartfelt moment and a proposal that feels staged or panicked. The photographer must be prepared to navigate both people and place, anticipating when to act, where to stand, and when to stay still.

  • Use discreet signals or cues with the proposer to time your shot a gentle tap or pre-arranged glance can cue you without alerting the partner


  • Position yourself behind natural cover (a stone lantern, a pagoda column, or foliage) so you can shoot around a corner or from a concealed angle


  • Shoot in silent shutter mode with Sony to minimize distraction, and be ready to switch framing rapidly as the moment unfolds


After the proposal, it’s helpful to take a brief pause giving both partners a moment to settle before shifting into a more posed portrait session. This pause gives the couple time to process the moment, and it also allows the photographer to reposition, check lighting, and prepare the next shots.


The transition time is often where some of the most beautiful, emotional photos happen: when relief, joy, and surprise start to settle into laughter and hugs. Once the proposer and partner have had a moment, guiding them gently into small movements walking hand-in-hand, turning toward scenic views, or simply sitting together can help the session evolve naturally without rushing.


The guided portion should feel more relaxed, letting the couple move and interact organically rather than posing rigidly. In post-production, subtle editing that preserves the ambient lighting, environmental context, and emotional tones is crucial.


As a Sony shooter, I adjust exposures carefully so that ring reflections, skin tones, and ambient backgrounds remain natural and never over-processed especially in Kyoto’s wooden shrine structures or garden lantern lighting. The finished gallery should communicate not just the surprise moment, but the story of love, place, and atmosphere that surrounded it.


Planning ahead, staying calm, and remaining flexible are the best tools a photographer can have when capturing a surprise proposal in Kyoto. When those elements are in place, the resulting images won’t just document an engagement they’ll tell a rich, emotional story rooted in the uniqueness of Kyoto itself.


FAQ: How to Plan a Dream Proposal in Kyoto

1. When is the best time of year to propose in Kyoto for photo shoots?

The ideal seasons for a Kyoto proposal photoshoot are spring (cherry blossoms, late March–April) and autumn (maple leaves, November). These periods provide dramatic natural backdrops but also attract crowds so timing is critical for clean shots and intimate moments.


2. Which Kyoto locations are most suitable for a surprise proposal and beautiful photos?Top locations include Arashiyama Bamboo Grove, Maruyama Park, Philosopher’s Path, Nonomiya Shrine, and Higashiyama district temples. These spots offer stunning visual elements and often quieter corners especially if you plan for early morning or off-peak times.


3. Do I need a professional photographer in Kyoto for a proposal?

You don’t need one, but hiring a Kyoto proposal photographer ensures your surprise will be well-documented without distracting you or your partner. A professional photographer handles scouting, timing, crowd management, and photo flow letting you focus on the moment.


4. How do I plan a stealth or surprise proposal in Kyoto without spoiling it?

Planning a surprise proposal requires coordination: a photographer who knows how to “pose as a tourist,” communication of subtle cues, and timing the proposal exactly so your partner isn’t tipped off too early. Many local photographers specialize in these stealth techniques, helping ensure the surprise feels authentic.


5. What permits or permissions are required for proposal photography at temples and gardens in Kyoto?

Many Kyoto shrines and gardens have rules or require permission for professional photo shoots especially when tripods or extended sessions are involved. Locations like Heian Shrine or Maruyama Park may ask you to register or pay a fee. It’s crucial to check in advance with your photographer or the site to avoid disruptions.


6. What should we wear or bring for a Kyoto proposal shoot?

Choose outfits that contrast nicely with Kyoto’s backdrops soft pastel tones for spring, earthy tones for autumn, or neutral colors for temple settings. If you’re renting a kimono, allow time for dressing and plan footwear that’s easy to walk in. Also bring a small bag with essentials (like water, umbrella, or a change of shoes) so you stay comfortable.


7. What happens if it rains on the day of the proposal shoot?

Light rain or overcast skies can add a romantic mood and soft diffused light to your proposal photos. Transparent umbrellas or rain covers can even become creative props. But heavy rain or strong winds may force changes in location or timing, so it’s wise to have a backup plan or alternate site.


8. How far in advance should we book a Kyoto proposal photographer?

It’s best to book several months ahead, Kyoto proposal sessions, especially in peak seasons (cherry blossom or autumn foliage), tend to fill up quickly. Planning ahead gives you a better shot at securing your preferred date, photographer, and location.


9. Can we combine our Kyoto proposal shoot with a post-proposal engagement or couple session?

Yes! Many couples extend their proposal session into an engagement shoot or a romantic walk afterward, capturing both the surprise and celebration. Make sure to discuss session length and photo plans with your photographer—this helps determine pricing and timing.


10. How long does it take to receive proposal photos, and how many will we get?

Delivery times and photo counts vary by photographer. Some provide a sneak peek within a few days; full edited galleries may take 1–4 weeks. Local Kyoto photographers often provide 30–100 edited images, depending on the session duration and package. Always confirm the timeline and deliverable details when booking.


Author Bio

Nacho (Sore de Nacho Photography) is a Kyoto-based photographer specializing in proposal photography in Japan, engagement sessions, and destination portrait work. With a Sony mirrorless setup and a background in storytelling, Nacho focuses on creating natural, emotional visuals that celebrate love, surprise, and the unique atmosphere of Kyoto’s temples, gardens, and historic streets.


Having worked with couples from around the world, Nacho understands how to plan surprise moments, manage light and location logistics, and guide couples through intimate, once-in-a-lifetime proposal sessions. Whether it’s a quiet morning walk through Arashiyama Bamboo Grove or a romantic moment under cherry blossoms, Nacho offers a seamless, creative approach to capturing your perfect Kyoto proposal.


Planning your dream proposal? Book a proposal photography session with Sore de Nacho and let’s bring your Kyoto engagement story to life with beautiful, lasting imagery.


bottom of page